Raising Crickets for Bait
If you searching for tips and techniques for how to raise crickets for fishing then this article will be of great help to you. Bluegill, bass and all other species of fish love to eat crickets, so save some money and raise your own bait! Just follow the simple steps that are given below-:
Purchase some tanks or containers that are big in size. You would require a tank or a container for keeping the crickets. It will be easier if you get 2 containers where one will serve as breeding ground for adults and the others will contain maturing young crickets. It is up to you to decide the number of crickets you wish raising and buy suitable containers. Ensure that the container purchased by you is sufficiently big for crickets to build their colony. A big mistake made by several individuals while raising crickets is not purchasing container that is big enough. If crickets breed in confined area, they start eating one another hence fewer crickets remain for your fishing requirements. Hence ensure that you are purchasing a tank that is big enough.
Buy a clear tote bin that comes with secure lid for keeping crickets inside. A popular choice is high-sided plastic boxes. If you buy 53 L container, it will hold a colony of nearly 500 crickets with considerable egg crates or cardboard crates for climbing on. Tote bins having smooth surface will reduce the count of escapees.
Your container should be breathable. For this you can cut 1 or 2 six inches holes in the lid of tote bin so as to provide ventilation for crickets. The top can be covered using metal mosquito screen that will prevent escapes because these insects can chew that entire plastic screen. Try using hot glue gun for securing container screen. Individuals can also experiment using variable vents in case they wish are looking for additional control over heat.
The floor of the tank should be layered using vermiculite. For this you can place one to three inches vermiculite in tote bin’s bottom. This provides crickets something that they can walk on and will also help in keeping the tank dry thus preventing bacteria and reducing odor. In case of denser colonies, it is a must and this vermiculite should be replaced after one to six months for getting some extra.
Use disposable plastic container that is filled with loose, highly damp top soil in tote bin. Females will be requiring it for laying their eggs. Try making it somewhat higher as compared to vermiculite so that crickets can get into this container easily. Ensure that the top part of the soil is pesticide and fertilizer free. Individuals can place a screen on the top surface of the soil for preventing crickets from eating or digging eggs. Through screen, females will be depositing eggs using their ovipositor (egg laying spike).
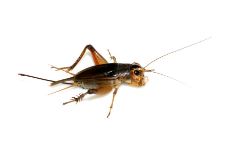
You need to purchase more than fifty crickets. Ensure that you are having sufficient amount of crickets for feeding your fishes with extra breed of around 30 to 50. Having a mix of female and male crickets is important but having females more than males is more preferred. Female crickets will have long extrusions behind them with one primary called ovipositor that will be used by them for depositing eggs in ground. Moreover, female crickets would grow completely developed wings as well. In case of male crickets, they will have 2 extrusions. Males can be characterized by under-developed and short wings that are used by them for producing familiar cricket call that people hear every night.
Now starts the breeding process. Collect the colony as well as allow them to feed. Your crickets should be placed completely inside the container. Put one shallow dish that contains commercial food eaten by cricket or some substitutes that would also work fine. Make sure that this dish is away from soil. Some eateries that can be given to crickets for feeding include green vegetables, potato slices, fruits, and other dietary supplements. Ensure removing unfinished food prior to it getting molded. There are some bizarre foods that can be given and these include foods having high protein content, pond fish pellets, tropical fish flakes, or rabbit food. You can mix different foods together as crickets become happy. Keeping your crickets healthy mean your fishing will be great.
Don’t forget to provide your crickets with sufficient amount of water. These insects require constant water supply for staying well and alive. Look at the crickets when they swarm towards water soon after you make the container mist. For keeping the container moist, individuals can use inverted bottle of reptile water dispenser having sponge in reservoir into the tank. This sponge helps in preventing drowning or flooding in tote bin.
For breeding, crickets require being warm. This also helps in incubation of their eggs. You can provide heat by different methods like heat pad, light bulb, or reptile heater. Give your crickets sufficient time for breeding. During this time they should be fed with proper food, heat, and water.
Approximately 2 weeks of time is good for them. Post 2 weeks, you’ll find top soil getting filled with eggs. These eggs will be ½ the size of your rice grains. Now remove top soil and put nesting container for incubating these eggs. Ensure that the topsoil is damp enough. Eggs that will get completely dry will die and won’t be of any use. Use a filled mister and spray it periodically on the topsoil for ensuring that heat isn’t coming out completely.
Raise the temperature of the tank to 85 degree F to 90 degree F. Egg incubation takes 2 weeks after which they start hatching. Now you will see pinhead crickets coming out just like grain of sand and daily hundreds of them will come out. Collect all these pinhead crickets after which place them in a rearing tank. In this tank you need to have complete stock of water and food so that baby crickets can grow to their appropriate size. Once this is done, they can be placed back into the main container and this would require seven to ten days more. Remember to keep the soil moisten and temperature between 80 and 90 degree F.
Purchase some tanks or containers that are big in size. You would require a tank or a container for keeping the crickets. It will be easier if you get 2 containers where one will serve as breeding ground for adults and the others will contain maturing young crickets. It is up to you to decide the number of crickets you wish raising and buy suitable containers. Ensure that the container purchased by you is sufficiently big for crickets to build their colony. A big mistake made by several individuals while raising crickets is not purchasing container that is big enough. If crickets breed in confined area, they start eating one another hence fewer crickets remain for your fishing requirements. Hence ensure that you are purchasing a tank that is big enough.
Buy a clear tote bin that comes with secure lid for keeping crickets inside. A popular choice is high-sided plastic boxes. If you buy 53 L container, it will hold a colony of nearly 500 crickets with considerable egg crates or cardboard crates for climbing on. Tote bins having smooth surface will reduce the count of escapees.
Your container should be breathable. For this you can cut 1 or 2 six inches holes in the lid of tote bin so as to provide ventilation for crickets. The top can be covered using metal mosquito screen that will prevent escapes because these insects can chew that entire plastic screen. Try using hot glue gun for securing container screen. Individuals can also experiment using variable vents in case they wish are looking for additional control over heat.
The floor of the tank should be layered using vermiculite. For this you can place one to three inches vermiculite in tote bin’s bottom. This provides crickets something that they can walk on and will also help in keeping the tank dry thus preventing bacteria and reducing odor. In case of denser colonies, it is a must and this vermiculite should be replaced after one to six months for getting some extra.
Use disposable plastic container that is filled with loose, highly damp top soil in tote bin. Females will be requiring it for laying their eggs. Try making it somewhat higher as compared to vermiculite so that crickets can get into this container easily. Ensure that the top part of the soil is pesticide and fertilizer free. Individuals can place a screen on the top surface of the soil for preventing crickets from eating or digging eggs. Through screen, females will be depositing eggs using their ovipositor (egg laying spike).
You need to purchase more than fifty crickets. Ensure that you are having sufficient amount of crickets for feeding your fishes with extra breed of around 30 to 50. Having a mix of female and male crickets is important but having females more than males is more preferred. Female crickets will have long extrusions behind them with one primary called ovipositor that will be used by them for depositing eggs in ground. Moreover, female crickets would grow completely developed wings as well. In case of male crickets, they will have 2 extrusions. Males can be characterized by under-developed and short wings that are used by them for producing familiar cricket call that people hear every night.
Now starts the breeding process. Collect the colony as well as allow them to feed. Your crickets should be placed completely inside the container. Put one shallow dish that contains commercial food eaten by cricket or some substitutes that would also work fine. Make sure that this dish is away from soil. Some eateries that can be given to crickets for feeding include green vegetables, potato slices, fruits, and other dietary supplements. Ensure removing unfinished food prior to it getting molded. There are some bizarre foods that can be given and these include foods having high protein content, pond fish pellets, tropical fish flakes, or rabbit food. You can mix different foods together as crickets become happy. Keeping your crickets healthy mean your fishing will be great.
Don’t forget to provide your crickets with sufficient amount of water. These insects require constant water supply for staying well and alive. Look at the crickets when they swarm towards water soon after you make the container mist. For keeping the container moist, individuals can use inverted bottle of reptile water dispenser having sponge in reservoir into the tank. This sponge helps in preventing drowning or flooding in tote bin.
For breeding, crickets require being warm. This also helps in incubation of their eggs. You can provide heat by different methods like heat pad, light bulb, or reptile heater. Give your crickets sufficient time for breeding. During this time they should be fed with proper food, heat, and water.
Approximately 2 weeks of time is good for them. Post 2 weeks, you’ll find top soil getting filled with eggs. These eggs will be ½ the size of your rice grains. Now remove top soil and put nesting container for incubating these eggs. Ensure that the topsoil is damp enough. Eggs that will get completely dry will die and won’t be of any use. Use a filled mister and spray it periodically on the topsoil for ensuring that heat isn’t coming out completely.
Raise the temperature of the tank to 85 degree F to 90 degree F. Egg incubation takes 2 weeks after which they start hatching. Now you will see pinhead crickets coming out just like grain of sand and daily hundreds of them will come out. Collect all these pinhead crickets after which place them in a rearing tank. In this tank you need to have complete stock of water and food so that baby crickets can grow to their appropriate size. Once this is done, they can be placed back into the main container and this would require seven to ten days more. Remember to keep the soil moisten and temperature between 80 and 90 degree F.
